Setting up a Redash Instance
Create an Instance
For basic deployments we recommend a minimum of 4GB of RAM and reasonable amount of CPU allocation. As usage grows you might need additional RAM and CPU power to support increased number of background workers and API processes.
To create an instance, you have the following options:
We have not updated our official images for V10 yet. However, you can deploy a V8 instance and upgrade it following these instructions.
There is a video demonstration of this process below
AWS
Launch the instance with the pre-baked AMI we create (for small deployments t2.small should be enough):
| Region | AMI |
|---|---|
| us-east-1 | ami-0d915a031cabac0e0 |
| us-east-2 | ami-0b97435028ca44fcc |
| us-west-1 | ami-068d0753a46192935 |
| us-west-2 | ami-0c457f229774da543 |
| eu-west-1 | ami-046c6a0123bf94619 |
| eu-west-2 | ami-0dbe8ba0cd21ea12b |
| eu-west-3 | ami-041bf9180061ce7ea |
| eu-central-1 | ami-0f8184e6f30cc0c33 |
| eu-north-1 | ami-08dd1b893371bcaac |
| ap-south-1 | ami-0ff23052091536db2 |
| ap-southeast-1 | ami-0527e82bae7c51958 |
| ap-southeast-2 | ami-0bae8773e653a32ec |
| ap-northeast-1 | ami-060741a96307668be |
| ap-northeast-2 | ami-0d991ac4f545a6b34 |
| sa-east-1 | ami-076f350d5a5ec448d |
| ca-central-1 | ami-0071deaa12b66d1bf |
(the above AMIs are of version: 8.0.0)
When launching the instance make sure to use a Security Group, that only allows incoming traffic on ports: 22 (SSH), 80 (HTTP) and 443 (HTTPS). These AMIs are based on Ubuntu so you will need to use the user ubuntu when connecting to the instance via SSH.
Now proceed to “Setup”.
Google Compute Engine
To get started on GCE, run the following commands in your Cloud Shell.
First, you need to add the Redash image to your account:
$ gcloud compute images create "redash-8-0-0" --source-uri gs://redash-images/redash.8.0.0-b32245-1.tar.gzNext, you need to launch an instance using this image. The n1-standard-1 machine type is recommended. You can launch an instance using the image with the command below (you may need to specify the zone of the instance with the --zone parameter):
$ gcloud compute instances create redash --image redash-8-0-0Now proceed to “Setup”.
Other
The AWS and Google Compute Engine images are created using our Setup Script, which is designed to run on many modern Linux distributions. You can either use the script as is, or use it as a blueprint to create your own setup.
What the script does is:
- Install Docker and Docker Compose.
- Download our recommended Docker Compose configuration and create initial configuration.
- Start everything.
Note that the script assumes you are running it on a “clean” machine. If you’re running this script on a machine that is used for other purposes, you might want to tweak it to your needs.
Docker
For every Redash release we also create updated Docker image. Our image follows best practices and can be used in any container orchestation platforms like Kubernetes, ECS or just simply with Docker Compose (which we use in our images).
If you do not use one of our cloud images, you must manually set up Redash’s secret keys:
- Create a
.envin the same folder as yourcompose.yamlfile. - Write any sensitive environment variables in bash syntax:
REDASH_SECRET_KEY=...
REDASH_COOKIE_SECRET=...
GOOGLE_CLIENT_ID=...
Do not commit this file to version control.
For development environment setup, please refer to the developer guide (which includes Docker specific instructions as well).
To run Redash you need several instances of Redash (API server and background workers to run queries) along with Redis and PostgreSQL. If you don’t want or can’t use our images or Setup Script, you can refer to the Docker Compose configuration to understand what services you need to define.
Setup
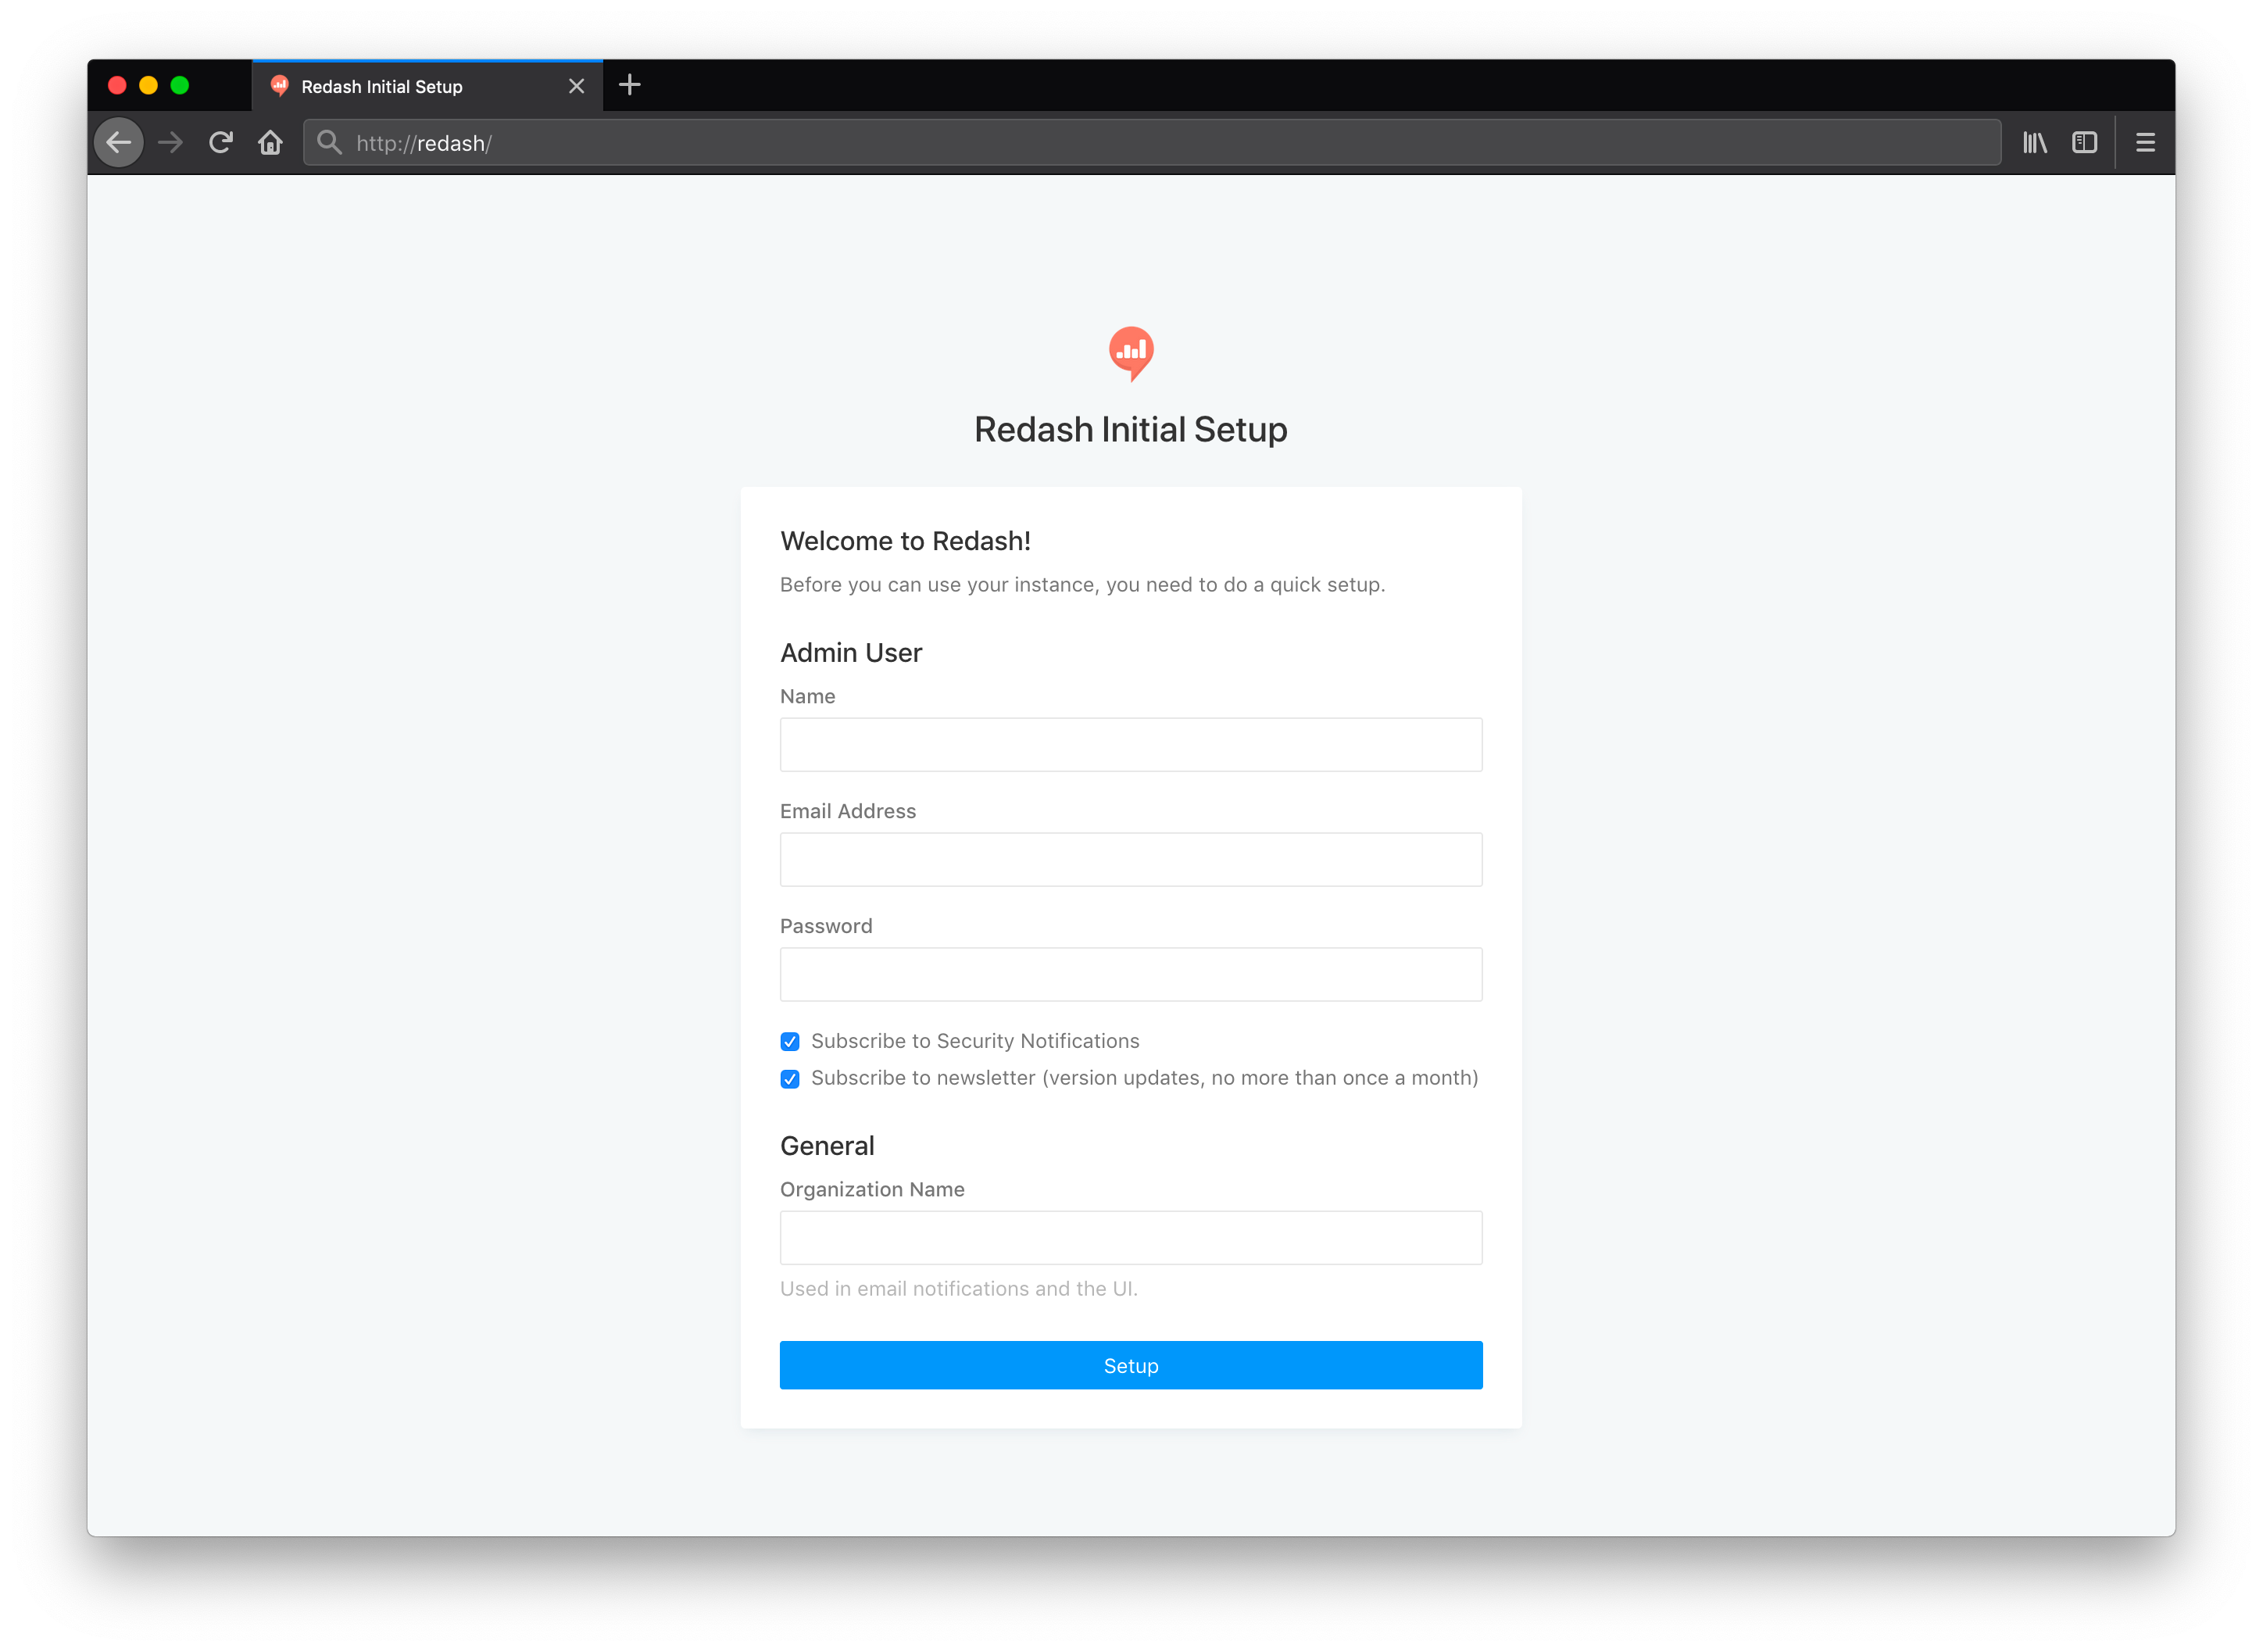
Once you created the instance with either the image or the script, you should have a running Redash instance with everything you need to get started. Redash should be available using the server IP or DNS name you assigned to it. You can point your browser to this address.
Before you can continue, it will ask you to create your admin account. Once this is done, you can start using Redash.
To make your setup more complete, there are a few more steps that you need to manually do:
Mail Configuration
For the system to be able to send emails (user invites, password resets, when alerts trigger and more), you need to configure Redash with the mail server you use. Mail server configuration is done using Envrionment Variables. If you’re using one of our images, you can do this by editing the /opt/redash/env file.
The relevant configuration variables are (note that not all of them are required):
REDASH_MAIL_SERVER(default: localhost)REDASH_MAIL_PORT(default: 25)REDASH_MAIL_USE_TLS(default: false)REDASH_MAIL_USE_SSL(default: false)REDASH_MAIL_USERNAME(default: None)REDASH_MAIL_PASSWORD(default: None)REDASH_MAIL_DEFAULT_SENDER(Email address to send from)
Also you need to set the value of REDASH_HOST, which is the base address of your Redash instance (the DNS name or IP) with the protocol, so for example: https://demo.redash.io.
Once you updated the configuration, restart all services (docker-compose up -d, running docker-compose restart won’t be enough as it won’t read changes to env file). To test email configuration, you can run docker-compose run --rm server manage send_test_mail.
It’s recommended to use some mail service, like Amazon SES or Mailgun to send emails to ensure deliverability.
Google OAuth Setup
If you want to use Google OAuth to authenticate users, you need to create a Google Developers project (see instructions and then add the needed configuration in the /opt/redash/env file:
REDASH_GOOGLE_CLIENT_ID(Google OAuth Client ID)REDASH_GOOGLE_CLIENT_SECRET(Google OAuth Client Secret)
Once updated, restart the web server (docker-compose up -d server). Once enabled, Redash will use Google OAuth to authenticate existing user accounts. To enable automatic user creation who belong to a specific domain name, you can add this domain (or more) in the setting page:

Other Configuration Options
Redash uses environment variables for configuration. For a full list of environment variables, see the settings article.
HTTPS
Health Check for Installation
/ping API endpoint.
RESPONSE
PONG.
How to upgrade?
It’s recommended to upgrade when new releases are available to benefit from bug fixes and new features. See here for full upgrade instructions.
QUICK NAV